Table of Contents
Start Page » DEMoCap: Drag[en]gine Motion Capture » Project Management
Project Management

Project Panel
To do motion capture a project has to be present at all times. If no project is present the autosave project is used. You can thus always just activate and calibrate a character to do quick motion capture. The captures are written to the overlay captured animation directory. For serious motion capture projects it is recommended to maintain own projects.
Projects store scenes and saved animations. Projects do not store actors and characters. These are stored globally. The project data is stored in a directory with the same name as the project file (without extensions) in the same directory as the project file is located in.
To manage projects click on the … button next to the Project label edit field. The following menu buttons can be clicked:
- New: Saves the current project and creates a new project. Shows a dialog to enter the filename of the project. Once created the new project is opened.
- Open: Saves the current project and opens an existing project. Shows a dialog to select the project file to open.
- Save: Saves the current project. Projects are automatically saved during these events:
- Switching scenes
- Removing scenes
- Changing world
- Saving animations
- Finish capture session
- Browse Data: Open project data directory in operating system native file browser
Scenes
Scenes store a specific capture scene. These are typically replicas of the game or cutscene scenes the animations are to be captured for. Scenes compose of a world and a list of scene objects.
The world file can be edited with the Drag[en]gine Integrated Game Development Environment (IGDE). This allows to set up a world up front and load it into a scene. The content of the loaded world is static and can not be changed. For dynamic content you have to use scene objects.
You can not use your world file directly in DEMoCap since the path you used for resource files (like models, skins and so forth) are different than inside DEMoCap where the world files are stored relative to the project data directory. To fix this you have to set a world property named democap.remapPropertyPath. This property contains the path prefix DEMoCap has to replace with the directory the world file (*.deworld) is located.
For example if your world file in your game is called /mocap/worlds/office.deworld then set the property value to /mocap/worlds. This way all the resources used in the world that are underneath the same directory will be properly remapped to work in DEMoCap.
To change the world select the world from the combo box next to the World label. Then click the … button next to the combo box. Click on the Activate World button.
Activating a world removes all scene objects. If you do not want to loose your current scene make a copy first.
World files are stored globally in the overlay directory. Clicking the Browse Worlds button opens an operating system native file browser for the overlay directory. Place your pre-made world files in this location. Keep in mind what object classes DEMoCap does know and that the world file directory has the VFS path /content/worlds. Best practise is to put your world content inside a sub directory with the appropriate path used in object properties. If you want to use custom XML Element Classes place them in the same directory. DEMoCap scans /content/models and /content/worlds VFS directory trees for *.deeclass files.
The active scene can be selected using the combo box next to the Scene label. To manage scenes click on the … button next to the combo box. The following menu buttons can be clicked:
- Add: Add a new scene. Shows an input dialog to enter the scene name. Scene names have to be unique. Once created the new scene is activated.
- Duplicate: Creates a copy of the scene. The copy is activated.
- Rename: Rename the scene. Shows an input dialog to enter the scene name. Scene names have to be unique.
- Remove: Remove scene. The last scene can not be deleted. Switches to one of the remaining scenes.
Scene Objects
Scene objects represent dynamic content. Scene objects can be selected and manipulated either by the motion capture operator or the actor from within VR. A new scene contains these default scene elements:
- MoCapActor: The character used to record motion capture with. It is present as soon as a character has been activated. This scene object can not be deleted.
- MirrorLarge: The large mirror the actor can use to examine the character in VR. By default this scene object is hidden. This scene object can not be deleted.
Selecting a scene object (either using the combo box, by clicking on it by the motion capture operator or by the actor pointing at it and pulling the trigger) shows the properties in the area below the combo box. The scene objects can be managed by clicking on the … button next to the combo box. The following menu buttons can be clicked:
- Add: Adds a new scene object. Shows an input dialog to select the Object Class to use. The object class can not be changed after creating the scene object.
- Duplicate: Create a copy of the scene object.
- Remove: Remove the scene object
- Rename: Rename scene object. If a scene object has no name a default name is used composing of the Object Class and a unique identifier. Scene names helps organizing and locating scene objects easily. Scene object names are not required to be unique.
- Browse Objects: Opens the /content/models overlay directory in the operating system native file browser. You can place *.deeclass files here which are not world specific. World specific element classes are typically placed in /content/worlds.
DEMoCap provides some basic Object Classes:
- ActorMarker: Adds a 3D marker on the floor. This can be used to designate locations actors have to be for doing motion capture or for other purpose. Actor markers can be teleported to by using the yellow teleport handle.
- CapturedCharacter: Adds a character to capture motion for. Requires a character to be activated first.
- DynamicProp: Adds a props that can be moved and optionally affected by physics. Once added you have to set the model, skin and rig resource to use.
- StaticProp: Adds a prop that can is static which represents scene geometry. Once added you have to set the model, skin and rig resource to use.
The area below the combo box shows Behavior Properties supported by the Object Class. Only the important properties are shown to not clutter the interface. These are the behaviors:
- Component: Shows properties of ECBehaviorComponent. This defines the model, skin and rig to use for the object.
- Collider: Shows properties of ECBehaviorCollider. This defines physical properties and is required if the object is supposed to be dynamic.
- Captured Animations: Shows the captured animations attached to the object. See below for a detailed explanation.
- Interact Handles: Allows changing the size of interaction handles.
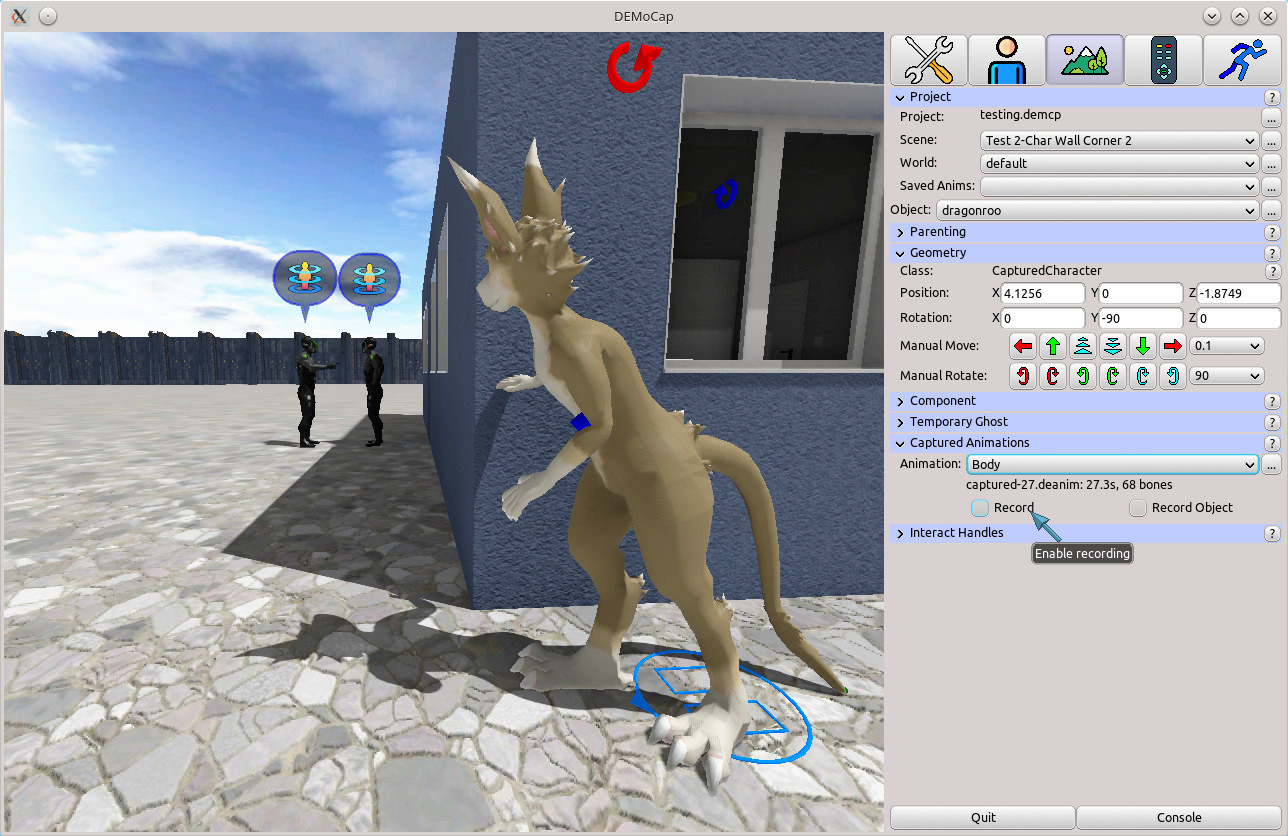
Captured Animations
Each object with object class CapturedCharacter supports multiple Animation Slots. This allows to record multiple animations per character for example to animate additional limbs, tails, wings and more. You can only record into a CapturedCharacter with the same Character Profile as the actor is currently using. Different Character Configurations are used to capture the individual animations.
Select the animation to capture into using the combo box next to the label Animation. If a captured animation is present the file information is shown below the combo box. To manage the animations click on the … button next to the combo box. The following menu buttons can be clicked:
- Add: Add animation. Shows an input dialog to enter the name. Animations have to use unique names.
- Remove: Remove animation.
- Rename: Rename animation. Shows an input dialog to enter the name. Animations have to use unique names.
- Clear: Removes all animations.
- Save Animation: Save animation to for other scene objects potentially in different scenes. See Saved Animations below.
- Export Animation: Exports the captured animation to the export overlay directory. See Export Animation below.
- Browse exported: Opens the export directory in the project data directory in the operating system native file browser.
Saved Animations
Saved animations store an artificial reference to captured animations. This keeps the animation a live even if no CapturedCharacter is using it. Furthermore they are named allowing to located animations. A typical use case for saved animations is to capture reference animations against which various character animations have to match.
The combo box next to the label Saved Anims shows all saved animations in the entire project. To manage saved animations click on the … button located next to the combo box. The following menu buttons can be clicked:
- Rename: Renamed the saved animation. Shows an input dialog to enter the name. Saved animations have to use unique names.
- Load: Assigns the captured animation in the active Animation of the selected Scene Object.
- Remove: Remove the saved animations deleting the files if no CapturedCharacter is still using it.
- Export: Exports the saved animation to the export overlay directory. See Export Animation below.
- Browse exported: Opens the export directory in the project data directory in the operating system native file browser.
To save animations see above.
Export Animations
For using the captured animations in Blender or directly in the Drag[en]gine you are not required to export them. Internal animations are usage managed and are deleted if not used anymore. Exporting animations stores them in the export directory inside the project data directory and prevents them from being automatically managed.
Exporting animations shows an input dialog to enter a name. The name is used to write the files to the export overlay directory. The following files can be written:
- {projectDirectory}/export/{name}.deanim : Motion captured animation.
- {projectDirectory}/export/{name}.demca : Meta file containing information about the capture.
- {projectDirectory}/export/{name}-devices.deanim : Devices captured animation if used.
- {projectDirectory}/export/{name}-devices.derig : Devices captured rig if used.
- {projectDirectory}/export/{name}-object.deanim : Captured object position and orientation.
- {projectDirectory}/export/{name}-object.derig : Captured object position and orientation rig.
To make captures more efficient the Auto Export setting can be enabled in the Settings Panel. If enabled and a Stage Direction is selected each capture down on a Captured Characters is automatically exported into a sub directory with the same name as the stage direction. If the capture exists already it is overwritten. This avoids the need to manually export captures which is especially a time saver for single-person use.
Auto exporting exports animations into directories of this pattern: {projectDirectory}/export/{scene}/{stage direction}/{object}/{animation}.*.